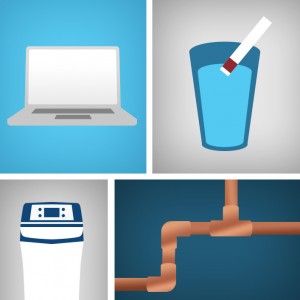
Easy approaches to water softener installation
When it comes to water softeners, the selection and installation process can be a bit overwhelming. But with a few easy tips, savvy  DIYers can solve their hard water problems easily and affordably. Here are a few key tips to keep in mind:
It all starts with research
- Learn your hard water number and assess your household’s water use to help determine the best solution for your home.
- Find out which tools you’ll need to successfully prepare for and install your water softener as well as any additional tubing or fittings.
- Purchase flex connectors to help the installation. They eliminate issues of mating pipes to the height of the softener inlet/outlet, reduce stress on pipes, and take less time than traditional soldering. Flex connectors are found at any home improvement store.
- Choose the appropriate salt pellets for your water softener. High-quality salts, like evaporated salt, which is the purest form of salt, will result in fewer maintenance problems over time. Additionally, for homes that are concerned with clear water iron in their water supply, salt pellets are available that include a rust remover component.
Preparing for the installation
- Select the right location for the water softener. The best spots are level and dry, have at least 10 feet of piping between the softener and the water heater and are near the main water line, a drain and an electrical outlet.
- If installing outside, ensure your softener will be protected from the elements (rain, freezing temperatures, direct sunlight)
- Create and follow a detailed checklist to ensure you don’t miss key steps during installation.
Installation checklist
- Turn off the water supply at the main.
- Drain the water lines by turning on a faucet at the highest and lowest points in the house.
- Make sure that the incoming water connects to the inlet on the valve and that the outlet on the valve connects to the water supply going into the house. (Note: Many homes have a cold water supply line that branches off the main to supply outdoor hose connections. This water should not be softened.)
- Optionally, install a remote bypass that lets you shut off the water going to the softener.
- Make the proper connections by making hard connections to the water supply lines or by using flexible connectors and connect any drain lines.
- Fill the brine tank half-full with salt.
- Slowly turn the water back on at the main and ensure the bypass valve is shut.
Start-up and maintenance
- Enter your home’s preferred regeneration settings (based on the number of people in your home and the average water use).
- Complete an initial manual regeneration to get the process started.
- Monitor salt levels and conduct routine maintenance.
- Upgraded to a new model? Call your local garbage company for guaranteed pickup of the old softener.
Whether you’re at the beginning of your water softener search or simply in maintenance mode, these are easy tips for every stage of the DIY process. However, if you would like to make sure that you have everything installed properly, contact one of our dealers for a free in-home assessment.

